


Motivation
The Python ecosystem offers many methods of installing and managing packages. You can simply download and extract code to your project directory, use the package manager from your operating system, or use a tool such as pip to install a package. To make sure your packages don’t collide, it is recommended that you use a virtual environment.
Why virtual environment are a good idea
Here are several reasons why installing packages globally using pip is a terrible
Huge security risk
Installing packages globally usually requires elevated privileges (such as sudo, root, or administrator). Don't forget that anyone can upload a package to PyPI without any vetting. That means that if the package contains malware, it now has superuser privileges to do whatever it wants.
It can mess with the existing packages
On an Ubutun Linux system, that means you could break
pipor evenaptitself because apip install -U <package>installs and updates both the package and all of the dependencies.It can break your other projects
All the projects try their best to remain backward compatible, but every pip install could pull in new/updated dependencies that could break compatibility with other packages and projects.
It pollutes your list of packages
Making it hard to keep track of your project's dependencies.
Major advantage to use virtual environment
- You can specify the Python version when creating the virtual environment
Using venv and virtualenv
To keep things simple, I recommend creating a directory where you keep all of your environments. Some people opt for an env, .venv, or venv directory within the project, but I advise against that for several reasons:
Your project files are important, so you probably want to back them up as often as possible. By keeping the bulky environment with all of the installed packages outside of your backups, your backups become faster and lighter.
Your project directory stays portable. You can even keep it on a remote drive or flash drive without having to worry that the virtual environment will only work on a single system.
It prevents you from accidentally adding the virtual environment files to your source control system.
If you do decide to keep your virtual environment inside your project directory, make sure that you add that directory to your .gitignore file (or similar) for your version control system.
Creating a venv
For Linus/Unix/OS X, using zsh or bash as a shell, it is:
$ python3 -m venv envs/your_env
$ source envs/your_env/bin/activate
(your_env) $
For Windows cmd.exe (assuming python.exe is in your PATH), it is:
C:\Users\user_name>python.exe -m venv envs\your_env
C:\Users\user_name>envs\your_env\Scripts\activate.bat
(your_env) C:\Users\user_name>
Powershell is also supporte dand can be used in a similar fashoin:
PS C:\Users\user_name>python.exe -m venv envs\your_env
PS C:\Users\user_name> envs\your_env\Scripts\Activate.ps1
(your_env) PS C:\Users\user_name>
Using virtualenv instead of venv is as simple as replacing the following command:
$ virtualenv envs/your_env
An additional advantage of using virtualenv instead of venv, in that case, is that you can specify the Python interpreter:
$ virtualenv -p python3.8 envs/your_env
Whereas while the venv command, it uses the currently running Python installation, so you need to change it through the following invocation:
$ python3.8 -m venv envs/your_env
Activating a venv / virtualenv
Every time you get back to your project after closing the shell, you need to reactive the environment.
Modifying your PATH environment variable to use
envs\your_evn\Scriptorenvs/your_env/binfor Windows or Linux/Unix, respectivelyModifying yoru prompt so that instead of
$, you see(your_env) $, indicating that you are working in a virtual environment
For Linux/Unix with zsh or bash as the shell, it is:
$ source envs/your_env/bin/activate
(your_env) $
For Windows using cmd.exe, it is:
C:\Users\user_name>envs\your_env\Scripts\activate.bat
(your_env) C:\Users\user_name>
For Windows using PowerShell, it is:
PS C:\Users\user_name> envs\your_env\Scripts\Activate.ps1
(your_env) PS C:\Users\user_name>
Installing packages
Installing packages within your virtual environment can be done using pip as normal:
$ pip3 install <package>
You can list installed packages:
$ pip3 freeze
Because our environment is isolated from the system, we only see the packages and dependencies that we have explicitly installed.
Fully isolating the virtual environment from the system Python packages can be downside in some cases becaut it take up more disk space and some packages might not be in sync with the C/C++ libraries on the system.
To mix your virtual environment with system packages, you can use the --system-site-packages flag when creating the environment
$ python3 -m venv --system-site-packages envs/your_env
When enabling this flag, the environment will have the system Python environment sys.path appended to your virtual encironment's sys.path, effectively providing the system packages as a fallback when an import from the virtual environment fails.
To list only packages local to the virtual environment, which excludes the system packages, you can use the following command.
$ pip3 freeze --local
Using pyenv
The pyenv library makes it really easy to quickly install and switch between multiple Python versions. To install pyenv , I recommend visiting the pyenv project page, since it depends highly on your operating system and operating system version. For Linux/Unix, you can use the regular pyenv installation manual or the pyenv-installer (https://github.com/pyenv/pyenv-installer) one-liner, if you deem it safe enough:
$ curl https://pyenv.run | bash
Windows does not support pyenv natively (outside of Windows Subsystem for Linux) but has a pyenv fork available: https://github.com/pyenv-win/pyenv-win#installation
After installing pyenv, you can view the list of supported Python versions using:
$ pyenv install --list
Once you've found the version you like, you can install it through the install command:
$ pyenv install 3.10-dev
Cloning https://github.com/python/cpython...
Installing Python-3.10-dev...
Installed Python-3.10-dev to /home/wolph/.pyenv/versions/3.10-dev
Once the Python version has been built, you can activate it globally, but you can also use the pyenv-virtualenv plugin(https://github.com/pyenv/pyenv-virtualenv) to create a virtualenv for your newly created Python environment:
$ pyenv virtualenv 3.10-dev your_pyenv
Activating the environment using the activate script in the environment directory is still possible, but more complicated than it needs to be since there's an easy shortcut:
$ pyenv activate your_env
Using Anaconda
Anaconda is a distribution that supports both the Python and R programming languages. It is much more than simply a virtual environment manager, though; it's whole different Python distribution with its own virtual environment system and even a completely different package system.
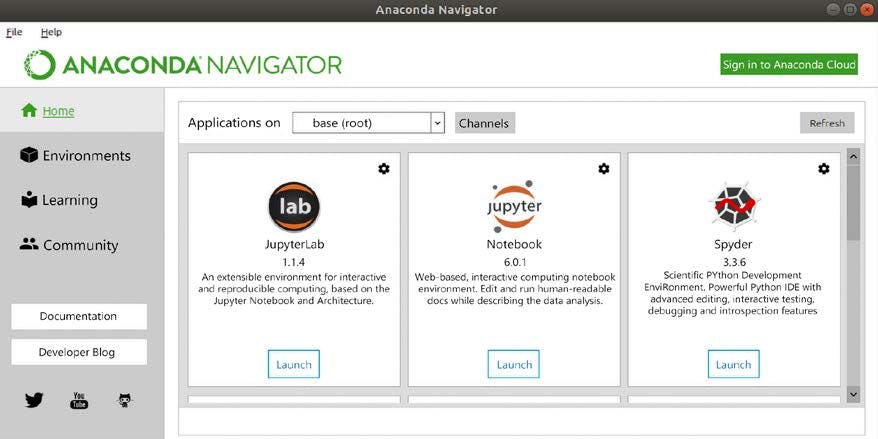
Getting started with Anaconda Navigator
Installing Anaconda is quite easy on all common platforms. For Windows, OS X, and Linux, you can go to the Anaconda site and download the (graphical) installer: anaconda.com/products/distribution#Downloads
Creating an environment and installing packages is pretty straightforward as well:
Click on the Environments button on the left.
Click on the Create button below.
Enter your name and Python version.
Click on Create to create your environment and wait a bit until Anaconda is done.
Getting started with conda
Create environment using conda
$ conda create --name conda_env
Collecting package metadata (current_repodata.json): done
Solving environment: done
...
Proceed ([y]/n)? y
Preparing transaction: done
Verifying transaction: done
Executing transaction: done
...
Actiate environment
$ conda activate conda_env
(conda_env) $
Get back into the conda base environment
$ conda activate
(base) $
To list the available environments, you can use the conda info command:
$ conda info --envs
# conda environments
#
base * /usr/local/anaconda3
conda_env /usr/local/anaconda3/envs/conda_env
Installing conda packages
For conda packages, you can simply use the conda install command.
(conda_env) $ conda install progressbar2
Collecting package metadata (current_repodata.json): done
Solving environment: done
## Package Plan ##
 environment location: /usr/local/anaconda3/envs/conda_env
 added / updated specs:
 - progressbar2
The following packages will be downloaded:
...
The following NEW packages will be INSTALLED:
...
Proceed ([y]/n)? y
Downloading and Extracting Packages
...
Now you can run Python and see that the package has been installed.
(conda_env) $ python
Python 3.8.0 (default, Nov 6 2019, 15:49:01)
[Clang 4.0.1 (tags/RELEASE_401/final)] :: Anaconda, Inc. on darwin
Type "help", "copyright", "credits" or "license" for more information.
>>> import progressbar
>>> for _ in progressbar.progressbar(range(5)): pass
...
100% (5 of 5) |##############################| Elapsed Time: 0:00:00 Time:
0:00:00
Another way to verify whether the package has been installed is by running the conda list command.
(conda_env) $ conda list
# packages in environment at /usr/local/anaconda3/envs/conda_env:
#
# Name Version Build Channel
...
Installing PyPI packages
With PyPI packages, we have two options within the Anaconda distribution. The most obvious is using pip , but this has the downside of partially circumventing the conda dependency checker. While conda install will take the packages installed through PyPI into consideration, the pip command might upgrade packages undesirably. This behavior can be improved by enabling the conda/pip interoperability setting, but this serioiusly impacts the performance of conda commands:
$ conda config --set pip_interop_enabled True
Depending on how important fixed versions or conda performance is for you, you can also opt for converting the package to a conda package:
(conda_env) $ conda skeleton pypi progressbar2
Warning, the following versions were found for progressbar2
...
Use --version to specify a different version.
...
## Package Plan ##
...
The following NEW packages will be INSTALLED:
...
INFO:conda_build.config:--dirty flag and --keep-old-work not specified.
Removing build/test folder after successful build/test.
(conda_env) $ conda build progressbar2
...
(conda_env) $ conda install --use-local progressbar2
Collecting package metadata (current_repodata.json): done
Solving environment: done
...
Sharing your environment
When collaborating with others, it is essential to have environments that are as similar as possible to avoid bebugging local issues.
(conda_env) $ conda env export –file environment.yml
(conda_env) $ cat environment.yml
name: conda_env
channels:
 - defaults
dependencies:
...
prefix: /usr/local/anaconda3/envs/conda_env
Installing the packages from that environment file can be done while creating the environment:
$ conda env create --name conda_env –file environment.yml
They can be also added to an existing environment:
(conda_env) $ conda env update --file environment.yml
Collecting package metadata (repodata.json): done
...
Today, we saw why virtual environments are useful and you discovered several implementations of them and their advantages. We explored how to create virtual environments and how to install multiple different Python versions.
Next time, we will dive into how to manage dependencies.
Thanks for reading.
Best Regards.